Things to Consider When Deciding to Paint Or Restore Your Car

Do you have a car or truck that runs great but looks horrible? (You can actually spot mine from outer space using Google Earth!) Would you like the looks of a newer vehicle without the new car price? If either is the case, then the answer may be to paint your ride! You can turn again your old age car because guys from Superiorshine.com.au can do a car paint protection in Melbourne if you are there in the area.

But where do you start? What’s involved? How can you do it without breaking your wallet?

Well, the answer to these questions will depend on a few factors. First off, is your vehicle worth investing in? For example, does it have a sound engine and transmission? Is it likely to continue running good for a while? Is the body still in decent condition? Or is it eaten away with rust? These are important questions to answer before deciding to invest more money into your vehicle.

Next, what do you want it to look like when it is all done? And how long do you want it to last? These two questions will help you figure out a lot. If you are looking for a high quality paint job with panels straighter than a ruler, then expect to pay. But if you just want it to look good and last a few years, then you may be able to get by with a cheaper paint job. Paint jobs can cost as low as a few hundred dollars (Maaco Special) and cost as high as 3 to 5 thousand dollars. So, really, the cost will depend on what kind of final results you are shooting for in the end. With this in mind, don’t be fooled by auto body shops that promise much for very little. The truth is-you get what you pay for when it comes to a paint job. Keep yourself informed. And take the time to shop around. With the answers to these questions you should be in a better position to make a good decision.

What, though, makes one paint job so expensive and another so cheap? Why such a difference?

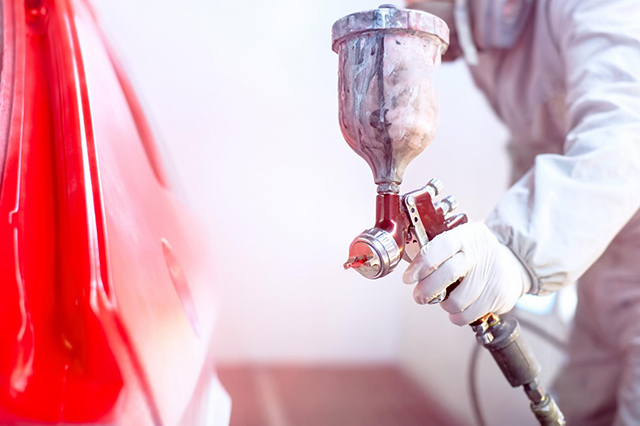
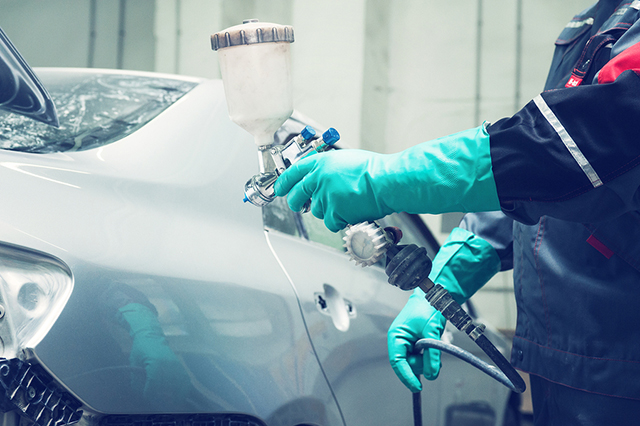
A big reason has to do with the type of paint materials that will be used. Acrylic enamels are the cheapest. But they may come only in certain colors and only last for two or three years. Urethane enamels can come in almost any color and be as durable as anything out there, but this will depend on the quality used. Urethane enamels are more durable than acrylic enamels but will cost more. Both have the shine and color built into one. Both are economical. However, sometimes these can lack luster and depth. In addition, if you want a color with metallic or pearl flakes in it, then, as any experienced paint tech will tell you, enamels often are difficult to work with.

The most durable and widely used paint on most vehicles today are basecoat/clear coat systems. These come in every color imaginable, have a deep shine, and can often be sanded and buffed later in order to remove any light scratches. Also, they can last from 5 to 15 years; or even longer. However, basecoat/clear coat systems can cost significantly more; but may be well worth it depending on how you answered some of the questions posed earlier. Maaco offers to paint a car for a few hundred dollars but will use an acrylic enamel. Maaco can also paint a car with a basecoat/clear coat system, but last time I checked, even Maaco’s base price for this is about $1500. Add to all this lots of body work, removing parts, and preparing panels and the price can go higher.

However, sometimes money can be saved by using a more economical basecoat/clearcoat system. For example, the Sherwin William’s brand “ULTRA 7000” basecoat color can cost anywhere from $50 – $90 per pint. (It is great paint.) But Sherwin Williams also has an economical line of basecoat color that costs about $10 – $20 per pint; a significant savings. And, in my experience, it gives you many of the same benefits as other, more expensive, basecoat/clearcoat systems. The differences between the premium grade paint systems and more economical ones may well be seen in how well they resist fading and peeling as time goes on. So, again, what you decide in this regard depends on how you answered some of the questions that I posed earlier.

What’s left to be said, then?

Be shrewd. When a shop offers to paint your car ask them some questions. “What type of paint will you use? How much care will you take with the body work? Will you take parts off so there is no danger of peeling later on? Will you wet-sand and polish out any dirt left in the paint when done? If I removed parts and did some of the prep myself could I get a discount?” Any reputable shop will be happy to let you know what is involved. And most will even work with you to come up with a plan for your car or truck that will fit your budget while giving you the look you want.

So, if painting your ride is something you would like to do, then give it some thought. And when you do, don’t forget to ask others about your local, small-town body shops. Many of them do great work and care about the reputation they leave with their friends in the community.

For more information, please visit me at [http://www.paintnbodywork.com]. Read other helpful articles, get tips and advice on common vehicle appearance, restoration questions. Browse our articles, our top how-to video picks, and shop at our online selection of stores that have great deals on auto parts, restoration supplies, and other items. Get recommendations on our favorite products for detailing, painting, repairing dents on all of your vehicle projects. Ask us a question if you’d like!

Danny Leary

[http://www.paintnbodywork.com]

Danny Leary has been in the auto body repair field for many years. He enjoys sharing his knowledge and resources to help others with their auto restoration projects. He also has experience in Paintless Dent Repair, Windshield Chip Repair, Headlight Restoration, Vehicle Graphic Wrap Design, and Website Design.

Article Source: http://EzineArticles.com/expert/Danny_Leary/571469

Article Source: http://EzineArticles.com/3838430

Auto Detailers Secret

Car paints can now be secured with coverings utilizing nanotechnology. Scratches and dents on automobiles are any automobile owner’s headache. Nanotechnology is becoming increasingly popular in Melbourne. This service is ideal for paint protection finishings and car paints. In truth, when it pertains to car paint protection Melbourne is ahead of numerous other cities.

Types of paint protection:

Nanotechnology based vehicle paint protection can be divided into 2 categories, i.e., innovation incorporated within the car paint formula and that which is utilized as a coating on conventional car paint. The second variety is more versatile. It is also a blessing for used automobile buyers. Such finishes even more vary in their compositions. Examples of nanotechnology based finishes consist of ceramic polymer finishes and some nano particles consisting of coatings. The structure of the coatings ultimately determines the efficiency of the finishing.

What nanotechnology based car paints and paint coverings offer:

For beginners, these paints and finishings firmly affix the vehicle’s existing paint to the body of the vehicle. For that reason, scratches and swirl marks do not establish on the paint as easily as they would without such innovation. Breaking of paints is likewise not likely with this innovation in the paints or thanks to the finishing over the paint.

The nanotechnology based paints and coverings are also weatherproof. Therefore, water, heat, ultraviolet light, pollutants and some strong chemicals are not likely to damage the existing paint on the vehicle.

The automobile’s paint typically begins looking faded after a duration of time. With this finishing, the automobile looks as shiny as a brand-new automobile.

Cleaning the car ends up being really simple, and less time consuming too. Bird droppings can also be cleaned extremely easily and will not harm the underlying paint. Similarly, some of these paints and coatings protect the automobile from scratches.

White paint on automobiles tends to turn yellowish in time. Some of these finishings are specially developed to avoid this.

Traditionally, waxes and sealants were utilized for keeping water off from the automobile’s body. However these disappear within a year approximately, and they need to be used again a number of times during the life expectancy of the car. Unlike such waxes and sealants, nanotechnology based car paints and paint finishes last for a long time, practically for the lifetime of the vehicle. Water, contaminants and some severe chemicals are accountable for the corrosion on the metallic frame once the paint wears off. Grime likewise makes the automobile appearance filthy and cleaning it is not that easy either. However with nanotechnology based automobile paints and paint coatings, cleaning gunk and dirt is considerably simpler.

Paint Protection in Melbourne

In Melbourne one of the most popular nanotechnology based paint finish is the Ceramic Pro. The producer of this paint finishing, which makes the automobile’s exteriors gleam like a brand-new vehicle, offers a lifetime warranty also. As the name recommends this paint coating consists of a ceramic polymer.

Conclusion:

Nanotechnology is fairly in the market of vehicle paints. It will quickly discover its way into other paints and minimize the have to regularly paint vehicles. New approaches are still being studied making the technology much more effective and people from Melbourne will be ahead of others in embracing such innovations.

Clean a Bare, Unfinished Cedar Wood Deck With Dish Soap

Restore that natural wood smell at the same time

Related image

If your beautiful, unfinished cedar or other natural-wood deck is looking more weathered than you like or has moss, lichen, or other dirt on it, there’s a quick and easy way to clean it without wasting money on harsh chemicals. I’ve done this many times on my own bare cedar deck and get better—and faster—results than when I used commercial deck cleaners. Note that this process may or may not work on decks that have been painted, stained, or varnished–test in a small hidden spot before attempting to use this procedure on those surfaces.

What You Will Need

Already Have It?
Shopping List
A deck-scrubbing brush–a stiff-bristled brush on a stick so you don’t have to bend down or work on hands and knees (a stiff-bristled broom may also work).
Dawn®-brand liquid dishwashing soap “with oxy and enzymes” (it’s biodegradable and safe for kids, animals and nearby plants).*
A large scrub bucket, such as a 5 gallon bucket.
Possibly necessary: a smaller brush or two to get into corners and crevices.
* Note that other brands of dishwashing soap may work just as well, but I can’t recommend them because I haven’t personally tried them.

First, Apply Soapy Water to Your Deck

1. Pour a medium amount of Dawn® dish washing liquid into the bucket–about twice the amount you’d use to wash a sink full of dishes: you want to get a lot of soap suds in the bucket (about half water, half suds)!
2. Fill the bucket with enough water to cover your deck surface or as much as it will hold without spilling out the soap suds floating on top.
3. Using the deck brush, apply the soapy water liberally to all surfaces you want to clean. If your deck is very large or if you have a lot to clean, you may need to make another batch of soapy water (repeat from step 1).
4. Wait 10-15 minutes for the solution to soak in and do its work. Make sure the surfaces don’t dry out during this time — use the hose to apply a VERY light mist of water to the drying areas. Apply more soapy water to any areas that start to dry too soon. An overcast day is best for this job.

Tips While You Wait for the Soapy Water to Work its Magic

Tip: This is a great time to get out the scrub brush and big sponge and get the whole family together to wash off deck furniture and cushions, decorations, flower pots and baskets (wash these down on the ground, not on the deck, to keep the deck from getting dirtier), porch decorations, and anything else you’ve got out on the deck. Even very little kids can help scrub flower pots and boxes. Use the same method of dish soap and soaking/rinsing after waiting 10-15 minutes that you use with the deck.

Trivia: It’s good to have children do chores around the house—they will grow up to be better adults if they do.*

Never Pressure-Wash Wood!

Important: Resist the temptation to use a pressure washer on real wood decking or siding!

Pressure-washing may appear to solve the immediate problem(s), but it raises the grain of the wood on the outside, thereby damaging the wood. This makes the wood more susceptible to rot and insects, makes splinters on bare feet more likely, and makes it difficult to stain uniformly if that is what you plan to do.

If you inherited a real-wood deck that was pressure-washed by the previous owners of your house, I recommend sanding off a very thin layer of the top of the wood. This will bring back the new-cedar smell (especially on damp early mornings or rainy days) and solve most of the problems caused by pressure-washing the wood.

After 10-15 Minutes, It is Time to Scrub/Brush Away the Dirt

5. Use the deck brush to brush or scrub the grime right off of your deck—with minimal scrubbing, even the dirtiest, darkest messes should come right off, leaving beautiful natural wood underneath.
6. When you are done scrubbing, either hose off the deck or empty your scrub bucket on a particularly dirty section and then hose off the deck using a mild to moderate water pressure to rinse away the grime and soap. DO NOT use high water pressure! This might damage the wood’s natural surface (see important note about not pressure-washing wood).
7. If there are any remaining areas that are dirty, you may need to follow this procedure again and do more scrubbing to get it clean. If all else fails, you might try a small amount of Formula 409® (which I doubt is good for the environment, so use as little as possible).

Smell the Cedar of an Unfinished Deck on a Misty Day

Notes:

  • If any dirty areas remain, repeat this process.
  • Warm water may work better, though I use the cold water straight from the hose with excellent results.
  • This process probably works just as well with other outdoor items, like plastic faux-wood decking and wood or plastic outdoor furniture; test in an inconspicuous spot before attempting to clean entire objects.
  • I recommend NOT using a pressure washer on real wood decks, bare or stained, because it causes the surface to become damaged–you can feel the difference by walking barefoot on it before and after, and the damage pressure washers do has been in the news a lot the last few years despite the fact that they are still sold for this purpose. Destroying the wood surface by using a pressure washer is probably going to reduce the wood’s lifespan, increase its vulnerability to insects, change how it works with stains and clear-coats if you plan on using them, and probably some other things as well. In any case, the cleaning method I describe above works on bare wood with mild to medium hose pressure or a mop and clear water, which don’t damage the deck surface, so pressure washers aren’t needed: all you need to do is rinse off the soapy water and grime.

If this process works just as well for you, or on other outdoor objects, or if you have an even cleaner/greener/easier solution, please let me know!

Dish Soap Works to Clean Siding and Roofs, Too

Siding

This method works tolerably well at removing dark spots, dirt, pollution, mold, and lichen from wood house siding and roofs. It also works on some other kinds of siding such as aluminum and steel.

Careful, though: be sure to experiment in a small hidden area before using this procedure on your whole house! You don’t want to have to re-paint or re-side your whole house if this doesn’t work for some reason!

+ To clean a small section of siding, use a bucket of sudsy water as described above.

+ To clean ALL of the siding, use a clean (preferably new; and mark that it is dedicated for this task) plastic suction-based pump that attaches to the end of your hose and is designed to pull bits of liquid fertilizer or bug spray or whatever (in our case, extremely concentrated sudsy water) up along with the water it dispenses. I can’t advise you on how much soap or soapy water to put into the uptake container or what setting to set the hose at: every situation is different and there are numerous models of dispensers on the market. So, a little experimentation will be necessary. Again, DON’T pressure wash real wood (even if it’s painted) and don’t forget to wait 10 minutes or more to let the soap soak and do its work. Then, use clear water to thoroughly rinse away all of the soap. Tip: Most of these suction pumps have a “clear water only” setting, so you don’t even have to reconfigure your hose to switch between these two tasks–or to mist sections that appear to be drying. A cloudy day is best for this task, and work in sections so that you can make sure no soapy water dries on the siding.