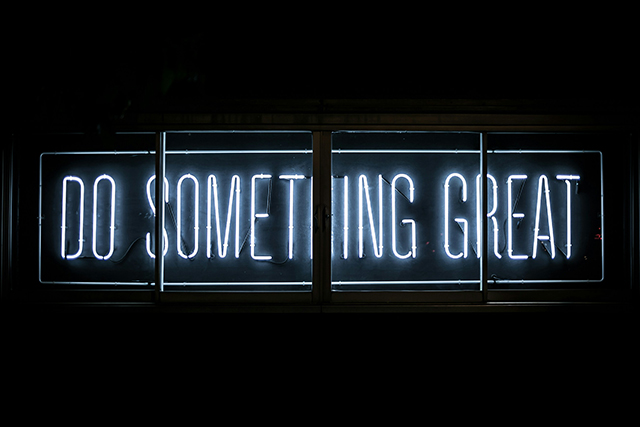
In the luxury travel market, first impressions and brand image play a critical role in setting a business apart. For companies offering high-end rental cars, visual branding is not just a design element—it’s a strategic advantage. Whether it’s a fleet of sleek European sports cars or a lineup of premium SUVs, professional signwriting offers a sophisticated method to reinforce brand identity, enhance aesthetics, and attract discerning clients.
This article explores the value of premium signwriter services for luxury rental car businesses, highlighting the role of visual design in shaping customer experience and retention. We’ll also explain why investing in a high-quality signwriters services package is essential for branding excellence in the competitive luxury rental sector.
The Role of Signwriting in Luxury Vehicle Branding
Signwriting, traditionally associated with commercial vehicles and storefronts, has evolved significantly. In today’s luxury auto market, it now represents a blend of art and marketing—providing tasteful customization that maintains the elegance of high-end vehicles while delivering strong brand recognition.
For luxury car rental companies, signwriting serves multiple purposes:
- Brand Identification: Clean, minimal logo placements and refined typography can subtly communicate a company’s identity without overwhelming the car’s premium design.
- Fleet Consistency: Uniform branding across vehicles creates a cohesive image, whether for airport pickups, events, or promotional campaigns.
- Marketing Tool: Branded vehicles act as mobile advertisements, increasing visibility in affluent neighborhoods, city centers, and tourist hotspots.
- Client Experience: Custom visual elements signal attention to detail, reinforcing the premium quality of the rental experience.
What Premium Signwriter Services Include
When engaging in a professional signwriters services package, luxury car rental businesses can expect a suite of tailored offerings. These typically include:
1. Design Consultation
A detailed brand discovery session to understand visual identity, target demographics, and vehicle types. Designers then create mockups suited to each car model’s dimensions and contours.
2. Material Selection
Only the highest quality materials are used, such as premium vinyl wraps, chrome or matte finishes, and UV-resistant adhesives. These materials ensure durability, weather protection, and easy removal when needed.
3. Custom Decal and Logo Application
Precision-cut decals and logos are applied with expert craftsmanship, ensuring alignment with the vehicle’s curves and design. Applications are often placed on doors, bonnets, rear panels, or subtle window tints.
4. Fleet Branding Management
For businesses with multiple vehicles, signwriter services may include coordination for rollout across the entire fleet, keeping branding consistent and maintenance efficient.
5. Special Event and Promotional Graphics
Temporary graphics can be created for film productions, weddings, corporate events, or seasonal promotions. These are easily removed post-event, without damaging the vehicle’s finish.
6. Maintenance and Removal Services
Professional removal services ensure that decals can be taken off cleanly without affecting the paint or clear coat. Ongoing maintenance services may include touch-ups, replacements, or UV protection layers.
Why Signwriter Services Matter in the Luxury Segment
In the premium rental market, small details have a big impact. Clients expect not only flawless performance from vehicles but also a refined and personalized visual experience. Signwriting offers a competitive edge that complements both brand and service.
A. Visual Excellence
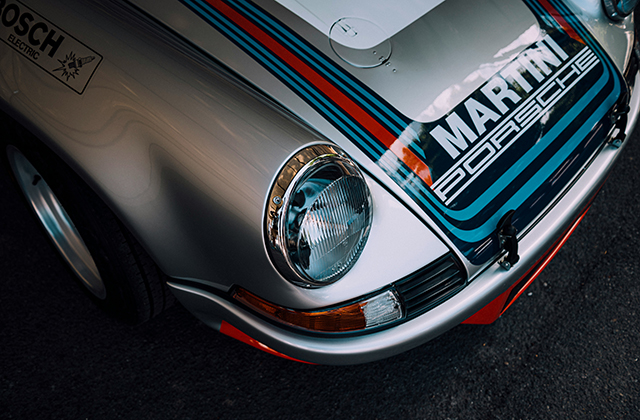
Luxury clients appreciate subtlety and sophistication. Tasteful branding via signwriting helps rental companies align their visual identity with the elegance of their fleet.
B. High-Impact Brand Visibility
Luxury vehicles naturally attract attention. With quality signwriting, every car becomes a mobile billboard—promoting the brand in upscale locations where traditional advertising might not reach.
C. Trust and Professionalism
A well-presented, professionally branded vehicle signals credibility. It tells clients that the company values detail, consistency, and presentation—core values that resonate with the luxury clientele.
The Customization Process: From Concept to Application
A premium signwriters services package typically follows a streamlined process:
- Initial Consultation: Determine branding goals, car types, client demographics, and visual preferences.
- Concept Design: Develop visual mockups tailored to each vehicle. This may include digital renderings from multiple angles.
- Client Approval: Review and approve final designs with input from marketing or design teams.
- Material Preparation: Source and cut materials precisely for the chosen applications.
- Installation: Apply decals in a climate-controlled facility to ensure quality and prevent environmental imperfections.
- Inspection and Delivery: Final quality checks before returning vehicles to the fleet.
Case Study: Branding a Luxury Rental Fleet in Melbourne
A Melbourne-based luxury rental company recently implemented a signwriter branding strategy across their fleet of Aston Martins, BMW 7 Series sedans, and Tesla Model Xs. Their goal was to enhance brand recall among high-net-worth tourists and corporate clients.
Using a minimalist chrome logo decal placed on the lower side panels and trunk lid, along with a custom matte black stripe on select vehicles, they achieved:
- 30% increase in brand visibility via social media shares
- Higher client retention due to enhanced brand perception
- Positive feedback from event organizers seeking prestige vehicles with clean branding
They sourced a local signwriters services package that included design, application, and seasonal decal rotation—proving the importance of professional customization in maintaining brand excellence.
Choosing the Right Signwriter Partner
When selecting a signwriter for your luxury fleet, look for these credentials:
- Proven portfolio with high-end or exotic vehicles
- Access to premium-grade materials and technology
- Experience with fleet-scale applications
- Insurance and warranty on applications
- Client testimonials or references
A partnership with a local provider also offers logistical benefits. Searching for nearby services—e.g., “premium signwriters services package near me”—can streamline communication, allow site visits, and facilitate faster project turnaround.
Maintenance Tips for Branded Luxury Vehicles
Proper care of branded vehicles ensures the longevity and integrity of decals:
- Hand wash only: Avoid high-pressure washers near edges of decals.
- Use pH-neutral products: Protect both decals and car paint.
- Avoid prolonged sun exposure: Park indoors or under cover where possible.
- Schedule periodic inspections: Address edge lifting or color fading early.
These practices ensure that branding remains fresh and consistent throughout the vehicle’s rental lifecycle.
Future Trends in Luxury Vehicle Signwriting
Looking ahead, several trends are expected to shape signwriter services in the luxury travel market:
- Sustainable Materials: Eco-friendly vinyls and water-based adhesives
- Smart Decals: Reflective, thermochromatic, or light-reactive graphics
- Augmented Reality Integration: Interactive branding visible through AR apps
- Luxury Partnerships: Co-branded decals with hotels, fashion houses, or events
As luxury clients increasingly seek personalization, signwriting will continue to evolve as a critical touchpoint for brand storytelling.
Conclusion
For luxury rental car businesses, investing in a high-end signwriters services package is more than a design decision—it’s a strategic branding move. Through custom visual enhancements, signwriting delivers a polished, memorable client experience while strengthening brand visibility across a discerning market.
By partnering with skilled professionals, rental companies can ensure their fleet stands out in style, sophistication, and consistency—qualities that define premium travel experiences. Whether applied for permanent branding or temporary event flair, signwriting remains an invaluable asset in the luxury rental landscape of 2025 and beyond.